Audio Unit Plugin
The Colossus Piano app ships with an Audio Unit plugin, which allows to use the Colossus Piano sounds directly within any DAW app supporting Audio Unit plugins. Audio Unit plugins on iOS behave similar to pro audio plugin system you might know from PC / Mac (i.e. VST, AudioUnit, RTAS), however with simplifications regarding usability for the iOS platform.
As mentioned in the previous chapter of this manual, Colossus Piano supports several technologies to use the Colossus Piano sounds together with third-party audio apps of other vendors. The major advantage of the Colossus Audio Unit plugin though in comparison to other solutions is that the Audio Unit plugin appears and behaves like being directly integrated within the DAW app of your choice, which makes your workflow more natural, convenient and less error prone. For instance with the Colossus Audio Unit plugin you don't have to care about things like MIDI channels. You simply create a track in your DAW app, then select a Colossus Piano sound for that track. For additional Colossus Piano sounds in your DAW song you simply create another track in your DAW app, select another Colossus Piano sound for that new track and that's it! Likewise your entire setup, all your tracks and Colossus Piano sounds are automatically saved and restored with your DAW song.
In the following we show you how to load the Colossus Audio Unit plugin into two popular DAW apps on iOS as two examples: GarageBand and Cubasis. In case you are using another DAW app, and since the way how to load and work with Audio Unit plugins varies between individual DAW apps, please refer to the user manual of your DAW app or contact the manufacturer of the host app for more information on this topic.GarageBand
Loading Audio Units
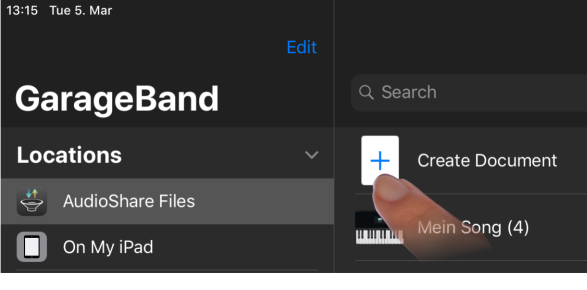 For this example, start a new GarageBand song as usual.
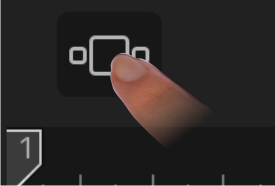 You should now be on the tracks view of GarageBand.
Tap on the instruments button located top left, to get
to the sound selection screen of GarageBand.
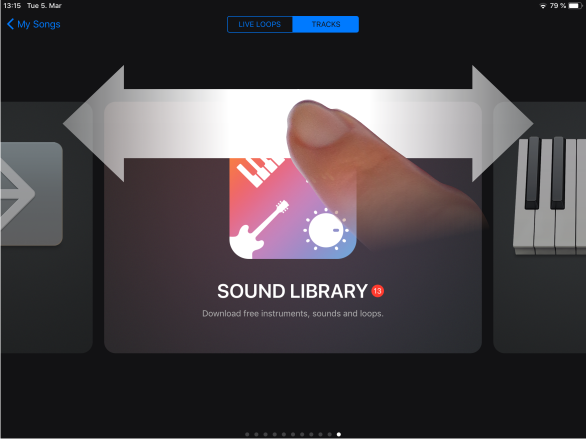 On the sound selection screen of GarageBand you can chose from
various different types of sound sources.
Swipe horizontally on this screen until you reach "EXTERNAL"
as sound source (see next image).
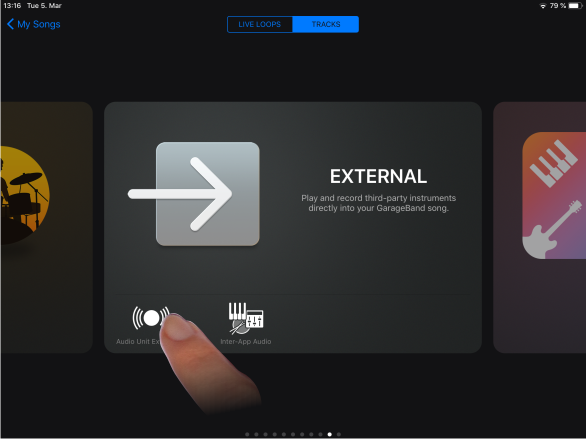 Now tap on the "Audio Unit Extension" button on the lower left.
 A list appears with audio apps which provide an Audio Unit plugin and are
currently installed on your iPad / iPhone.
Tap on the desired audio app icon to load its Audio Unit plugin into
GarageBand, e.g. tap on the "Colossus Piano" icon.
 GarageBand automatically switched back to its track view and shows
the user interface of the Colossus Audio Unit plugin in the
center of GarageBand's track view.
Once the Colossus Audio Plugin completed loading its sounds, you will see the status message "Ready" on the screen.
If you want to select a different piano than the default one, tap on the black box with its name
1 .
This opens a sound selection dropdown. Select the desired piano
by moving this sound selection upwards
2 and downwards
3 and tapping finally on the desired instrument name.
Additional Audio Unit Tracks
 Obviously you probably want to use several different Colossus Piano sounds
in your GarageBand song.
To do that, simply create a new track by tapping on the + button
on the lower left of GarageBand's track view and then repeat the steps
described above to select the desired Colossus Piano sound on the new
track.
Export as audio file
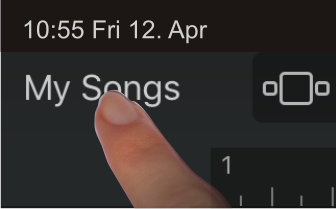 As a result of your work, you might want to export your GarageBand song as
audio file and share that final audio file with other people.
To export your song as audio file, first tap on "My Songs" button on the
top left to get to GarageBand's file browser screen.
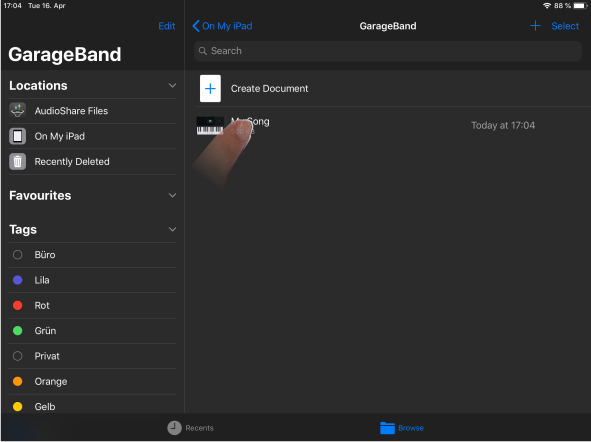 On the file browser screen of GarageBand you can see a list of all your
GarageBand songs.
Tap and keep holding your finger for about a second on the respective song
that you want to export as audio file, a popup appears with options that
you may do with the song.
Select "Share" from that popup.
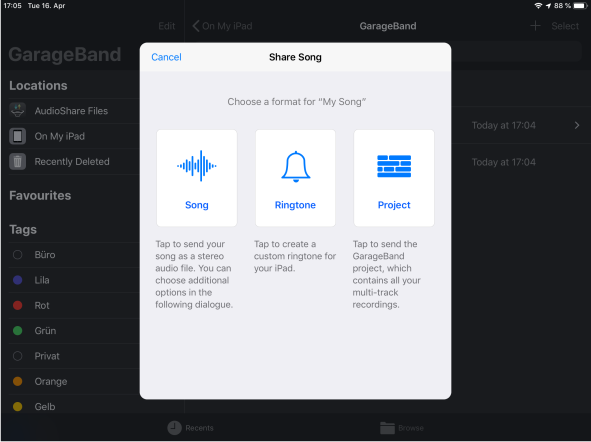 A new popup titled "Share Song" appears on screen.
Tap on "Song" to choose "audio file" as the desired
export format.
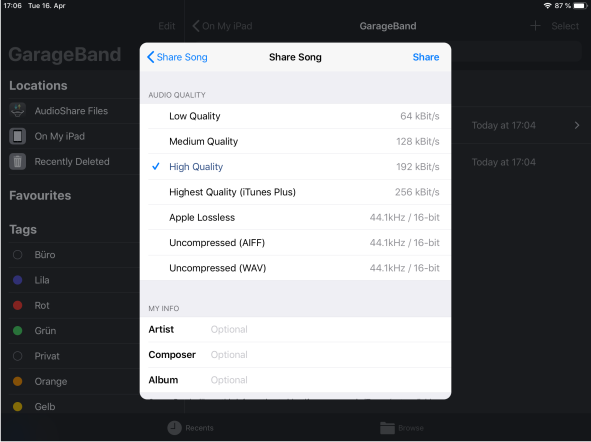 Now you are asked for the desired audio quality of the audio file
to be created. The higher the audio quality the larger the resulting
audio file will be and vice versa.
Once you made your quality decision GarageBand will start to
render the final audio file. This rendering process usually takes
between several seconds up to about a bit more than a minute, depending
on the amount of tracks, Audio Units being used and length of the song.
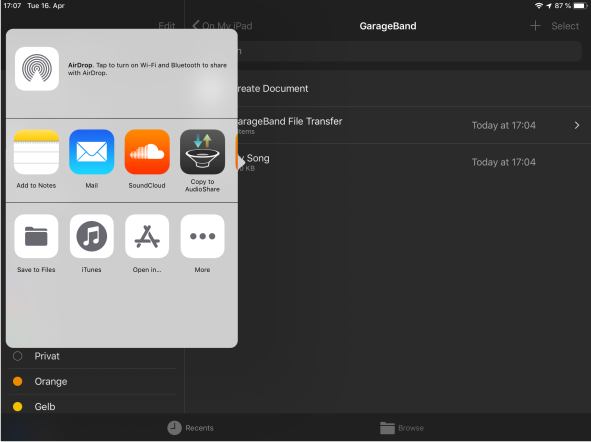 Once rendering of the final audio file completed, you are asked as final
action where the audio file shall be stored or sent to.
On the left you see an example of how this popup might look like. The precise
apps and services listed on this popup may vary on your device, depending
on which apps and services are currently installed on your device and which
ones you are using more frequently.
Select one of the apps or services listed on this popup to finally
store, upload, share or send your audio file at the desired location or
to import it into another app for subsequent actions.
Cubasis
Loading Audio Units
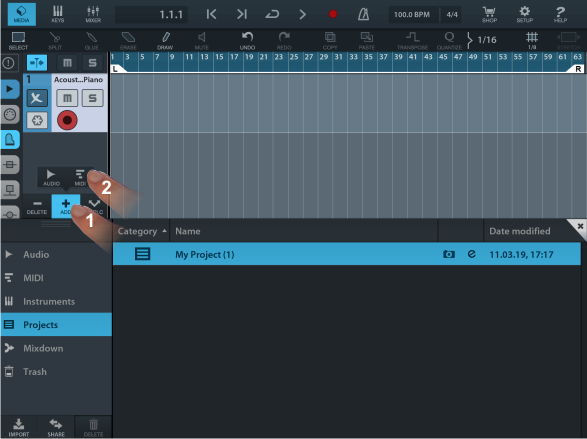 Like in the previous example with GarageBand, we are assuming in this example
with Cubasis that you just created a new Cubasis song at this point.
On the tracks view of Cubasis tap on the "ADD" 1 button on the lower
left and then select "MIDI" 2 to create a new MIDI track.
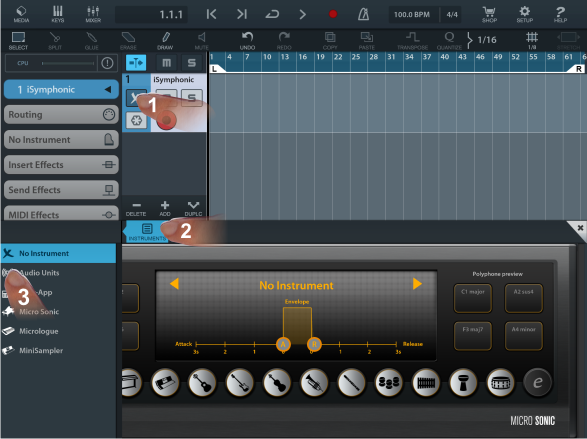 Now tap on the instrument
 1 button of that MIDI track,
then tap on "INSTRUMENTS" 2 located at the vertical center of
the screen and finally tap on "Audio Units" 3 on the lower
left section to get to the list of Audio Units.
 You should now see a list of Audio Units available on your device which should
appear on the lower left section of the screen.
Tap on the desired app to load its Audio Unit plugin on this Cubasis track,
e.g. tap on the "Colossus Piano" icon.
 The user interface of the Audio Unit plugin appears on the lower section of
the screen; in this example you see the Colossus Audio Unit plugin's
user interface.
Once the Colossus Audio Plugin completed loading its sounds, you will see the status message "Ready" on the screen.
If you want to select a different piano than the default one, tap on the black box with its name
1 .
This opens a sound selection dropdown. Select the desired piano
by moving this sound selection downwards and upwards
2 and tapping finally on the desired instrument name.
Additional Audio Unit Tracks
 To add additional Colossus Piano sounds to your Cubasis song, add a new MIDI
track to your Cubasis like previously described, then repeat the
procedures described above to load another Colossus Piano sound on the new
Cubasis track.
2 and then
select "Audio Units" on the lower left to finally get to the list of
Audio Unit plugins available on your device.
Export as audio file
 In order to create a final audio file of your Cubasis song,
you first have to get to the Media bay section of Cubasis.
So tap on the "MEDIA" button on the very top left of the screen.
 So tap the "MEDIA" button on the very top left of the screen
1, next on "Mixdown" at the lower left section 2,
then on "Create Mixdown" 3.
A popup dialog appears on the center of the screen
4. Select the desired audio rendering options for your song and finally tap on "Start Mixdown" to render the audio file.
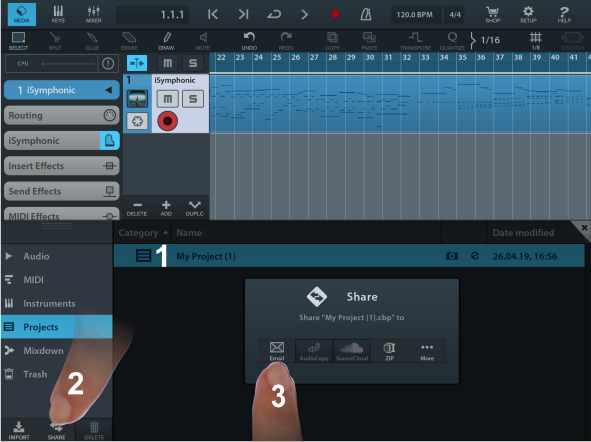 The rendered audio file is now saved like your Cubasis songs / project files
at the file space of the Cubasis app. So you can see the audio file listed
in the media bay section of Cubasis and listen to the rendered, final audio
file there. To actually send or share the audio file with other people, it
takes some more final actions:
Select the project 1, then tap on "SHARE" 2,
and finally choose a destination for the already rendered audio file
3.
