Getting Started
The following instructions are intended for users who are using the iCathedral App for the first time. It provides an introduction how to use the App and an overview of the most important features.
Launching the App
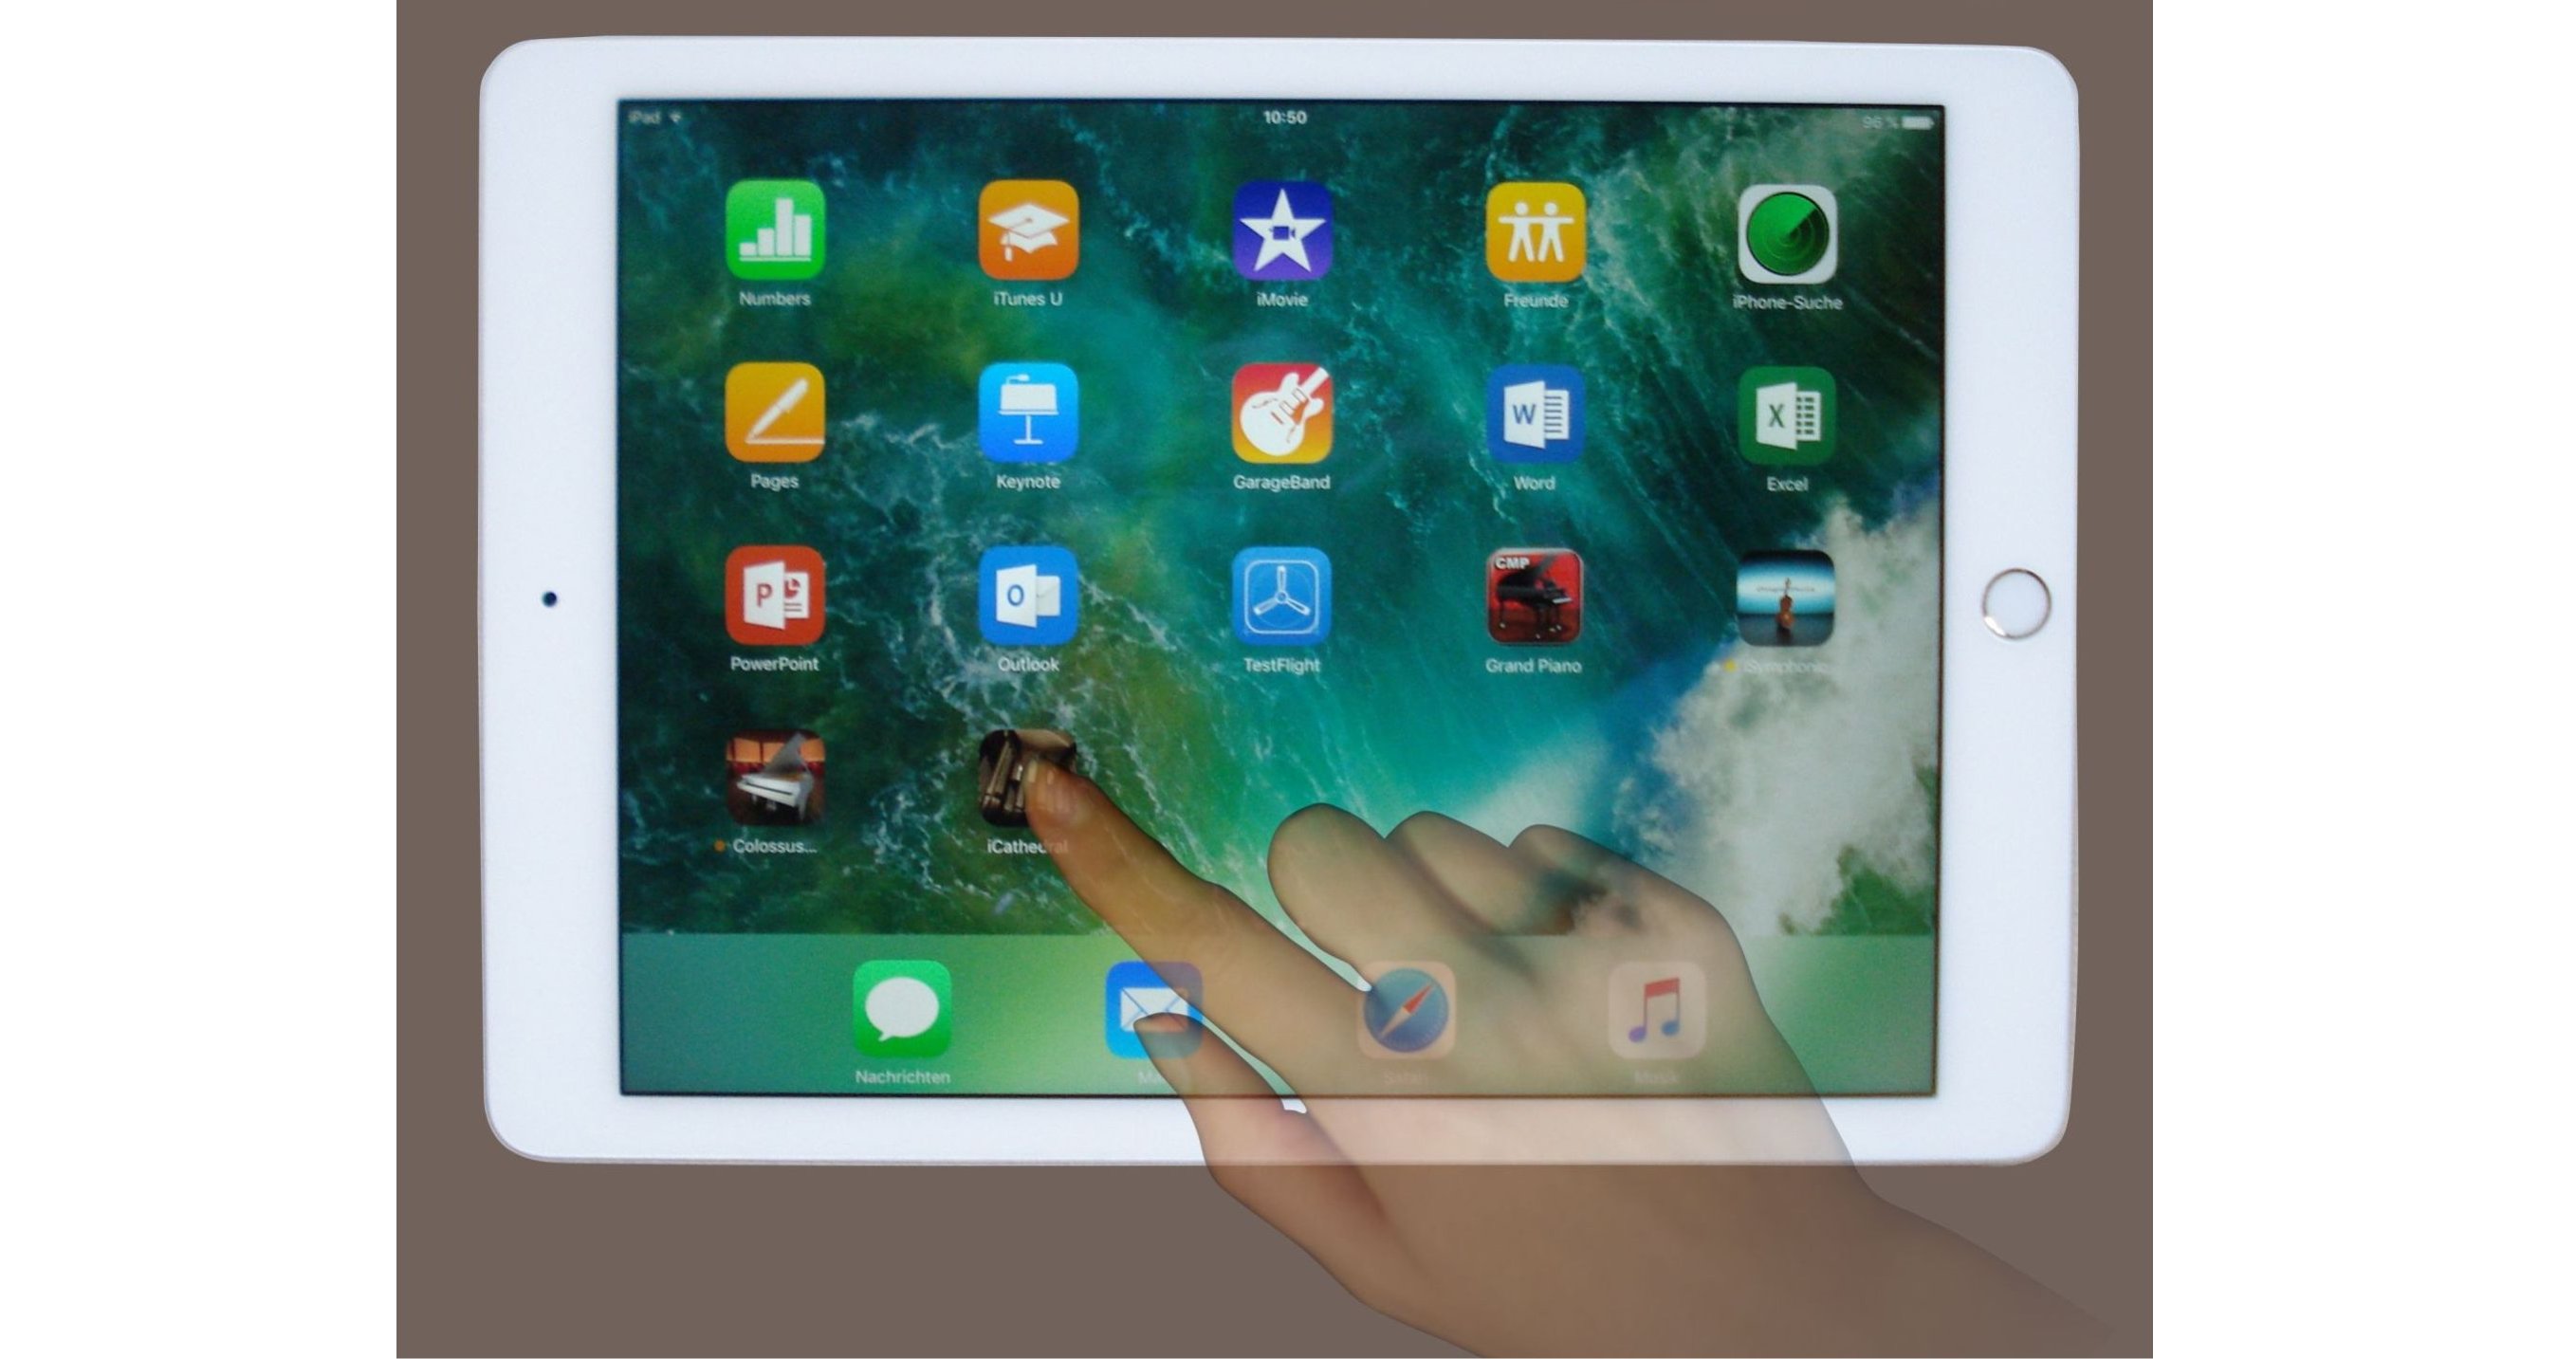
After you purchased and downloaded iCathedral from the App Store, you can launch the App by tapping on the iCathedral icon on your iOS desktop.
Select a Preset
iCathedral provides a choice of pre-edited presets. A preset consists of a combination of different stops. The first of them, named "Accompagnato 1" will be active immediately after you will have opened the App.

- Tap on the "Preset" combo box, a large list with preset names will unfold.
- Scroll the list up and down by dragging ("swipe") your finger vertically on the list. Finally tap on an item from this list to select the respective preset.
- Now the selected preset will be active. In this example you have selected "Accompagnato 2"
On-Screen Keyboard
For quick tests, or while being on the road with no real MIDI keyboard around, you can use iCathedral's on-screen virtual keyboard. It provides the full range of 88 keys of a regular piano keyboard. Simply tap on its keys to trigger notes on the currently selected preset.
The keys on the keyboard will also lit up when notes are triggered by MIDI on the currently selected preset. So you may also use the on-screen keyboard as pure visual indication to control whether your external MIDI keyboard (or MIDI song) is configured correctly for triggering notes on the currently selected preset.
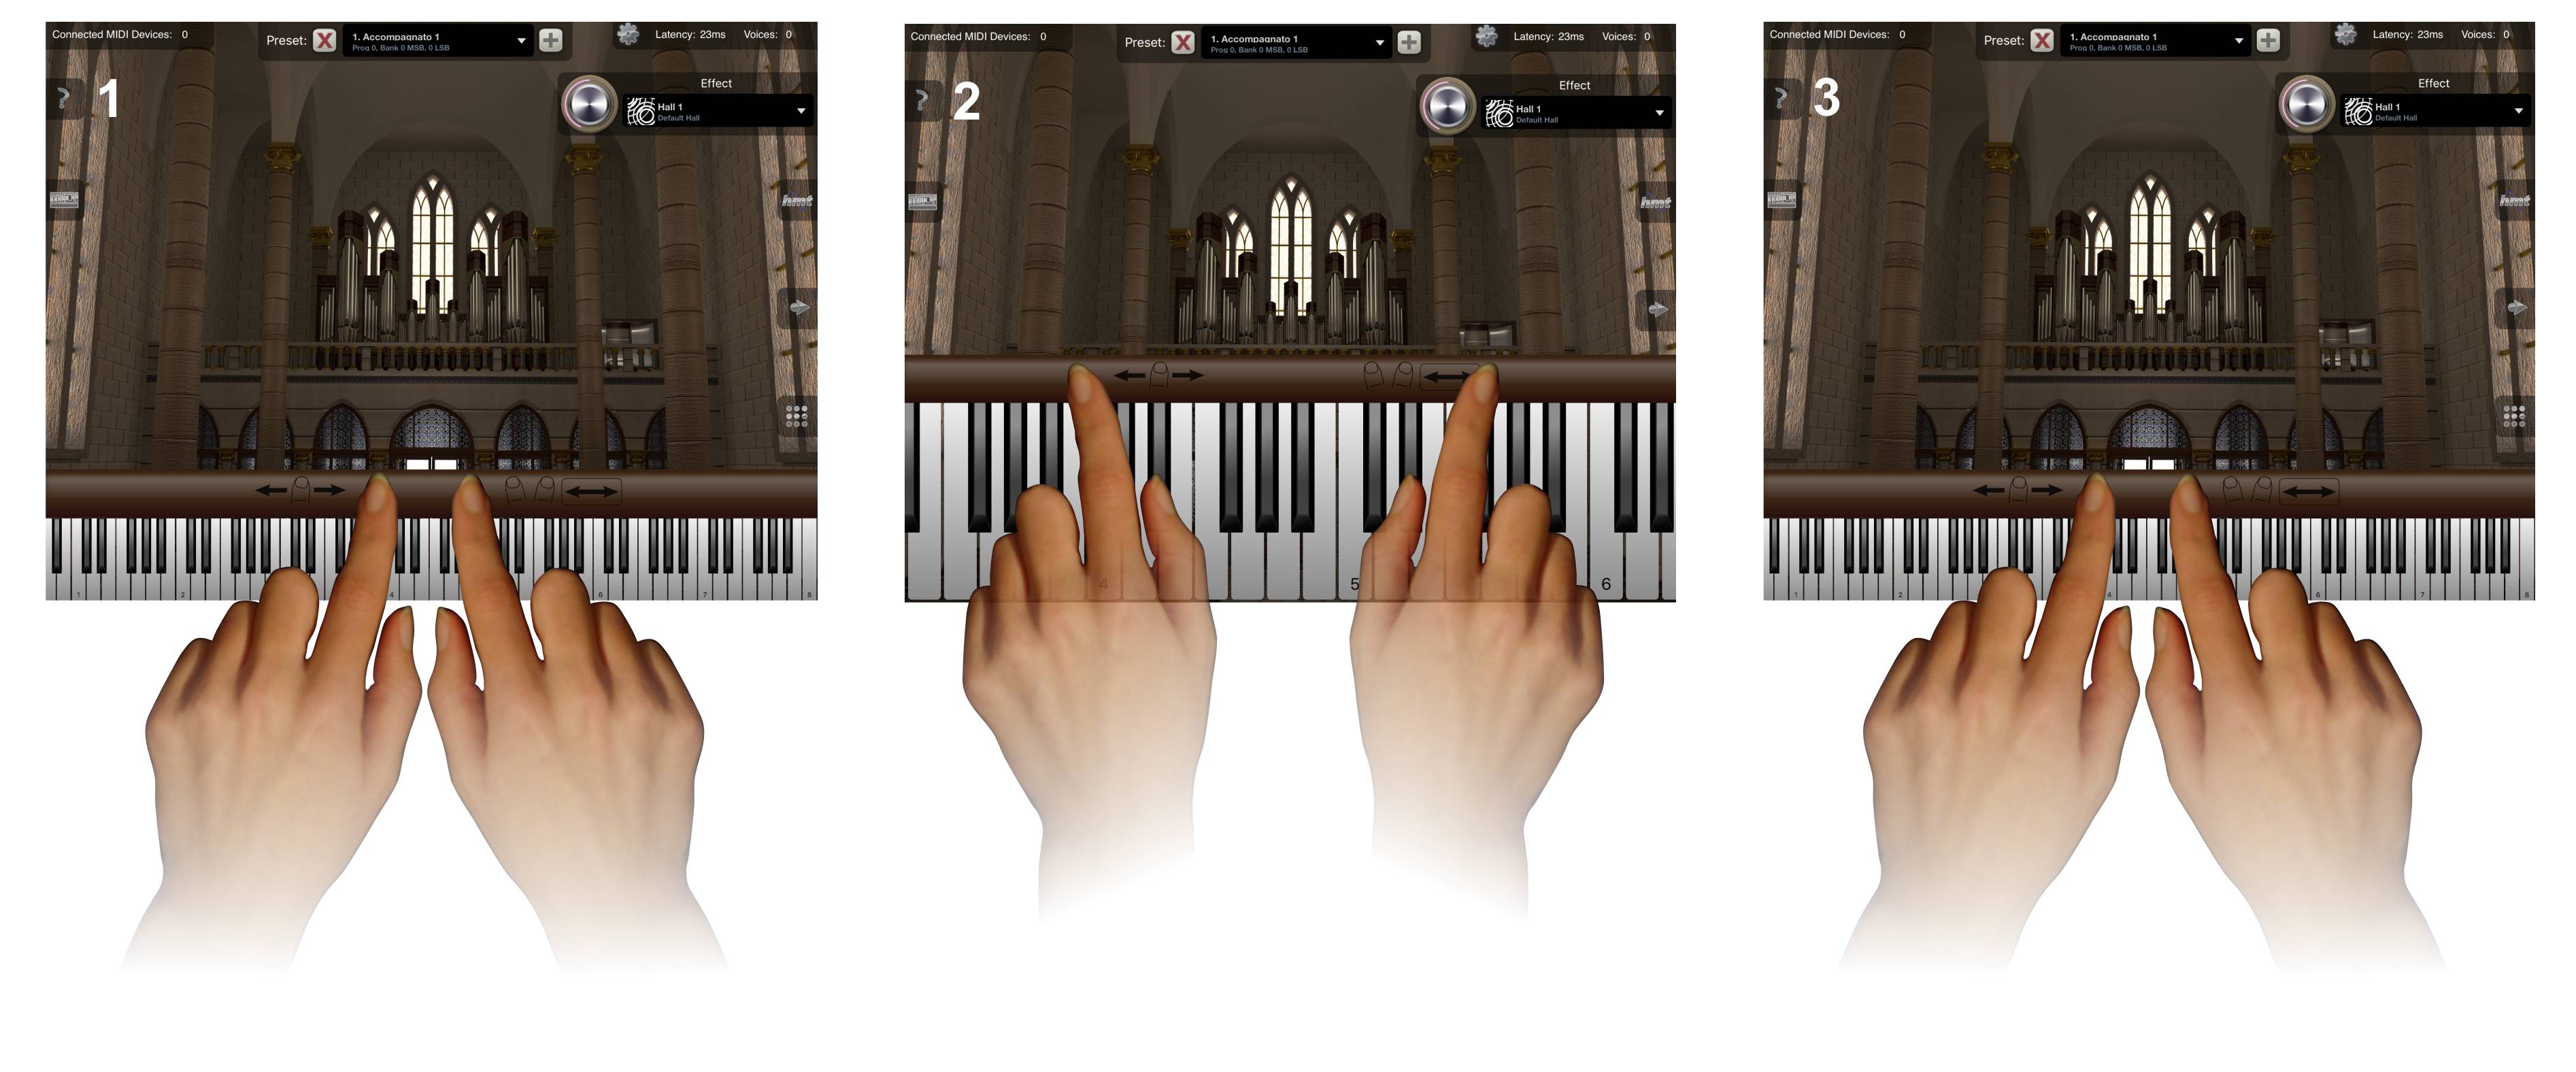
- Place two fingers next to each other in the middle of the approximately 1cm thick strip above the keyboard.
- Enlarge the keyboard: Drag your fingers away from each other to increase the size of the keyboard (by a so-called "pinch-zoom") on your screen to the desired dimension.
- Shrink the keyboard: Place again two fingers on the left and the right of the approximately 1cm thick strip above the keyboard. Then drag these fingers towards each other to decrease the size of the keyboard (by "pinch-zoom") to the desired dimension.
Assigning different MIDI channels to a preset
 As mentioned above it is recommended to split the key range of your
keyboard into at least two zones, each zone controlling a different MIDI channel. In case
you don't know how to handle this please refer to the manual of your keybard. How to assign
the different stops will be explained on the example of the default "Accompagnato 2" preset.
So please open this preset. Subsequently tap on the "MIDI" button, shown on the left.
As mentioned above it is recommended to split the key range of your
keyboard into at least two zones, each zone controlling a different MIDI channel. In case
you don't know how to handle this please refer to the manual of your keybard. How to assign
the different stops will be explained on the example of the default "Accompagnato 2" preset.
So please open this preset. Subsequently tap on the "MIDI" button, shown on the left.
The MIDI mapping windows opens. The three active stops of "Accompagnato 2" are shown in white. These are the stops "Flute 1", an 8' (eight foot) stop, "Octave", a 4' (four foot) stop and "subbass gedackt", a 16' (sixteen foot) stop. The 8' stop could and should be used for the complete key range, the 4' stop only for the descant zone and the 16' foot stop only for the bass zone. We assume that you have assigned MIDI channel 1 to the bass zone and MIDI channel 2 to the descant zone of your keyboard. Now handle the new MIDI channel mapping as shown below.
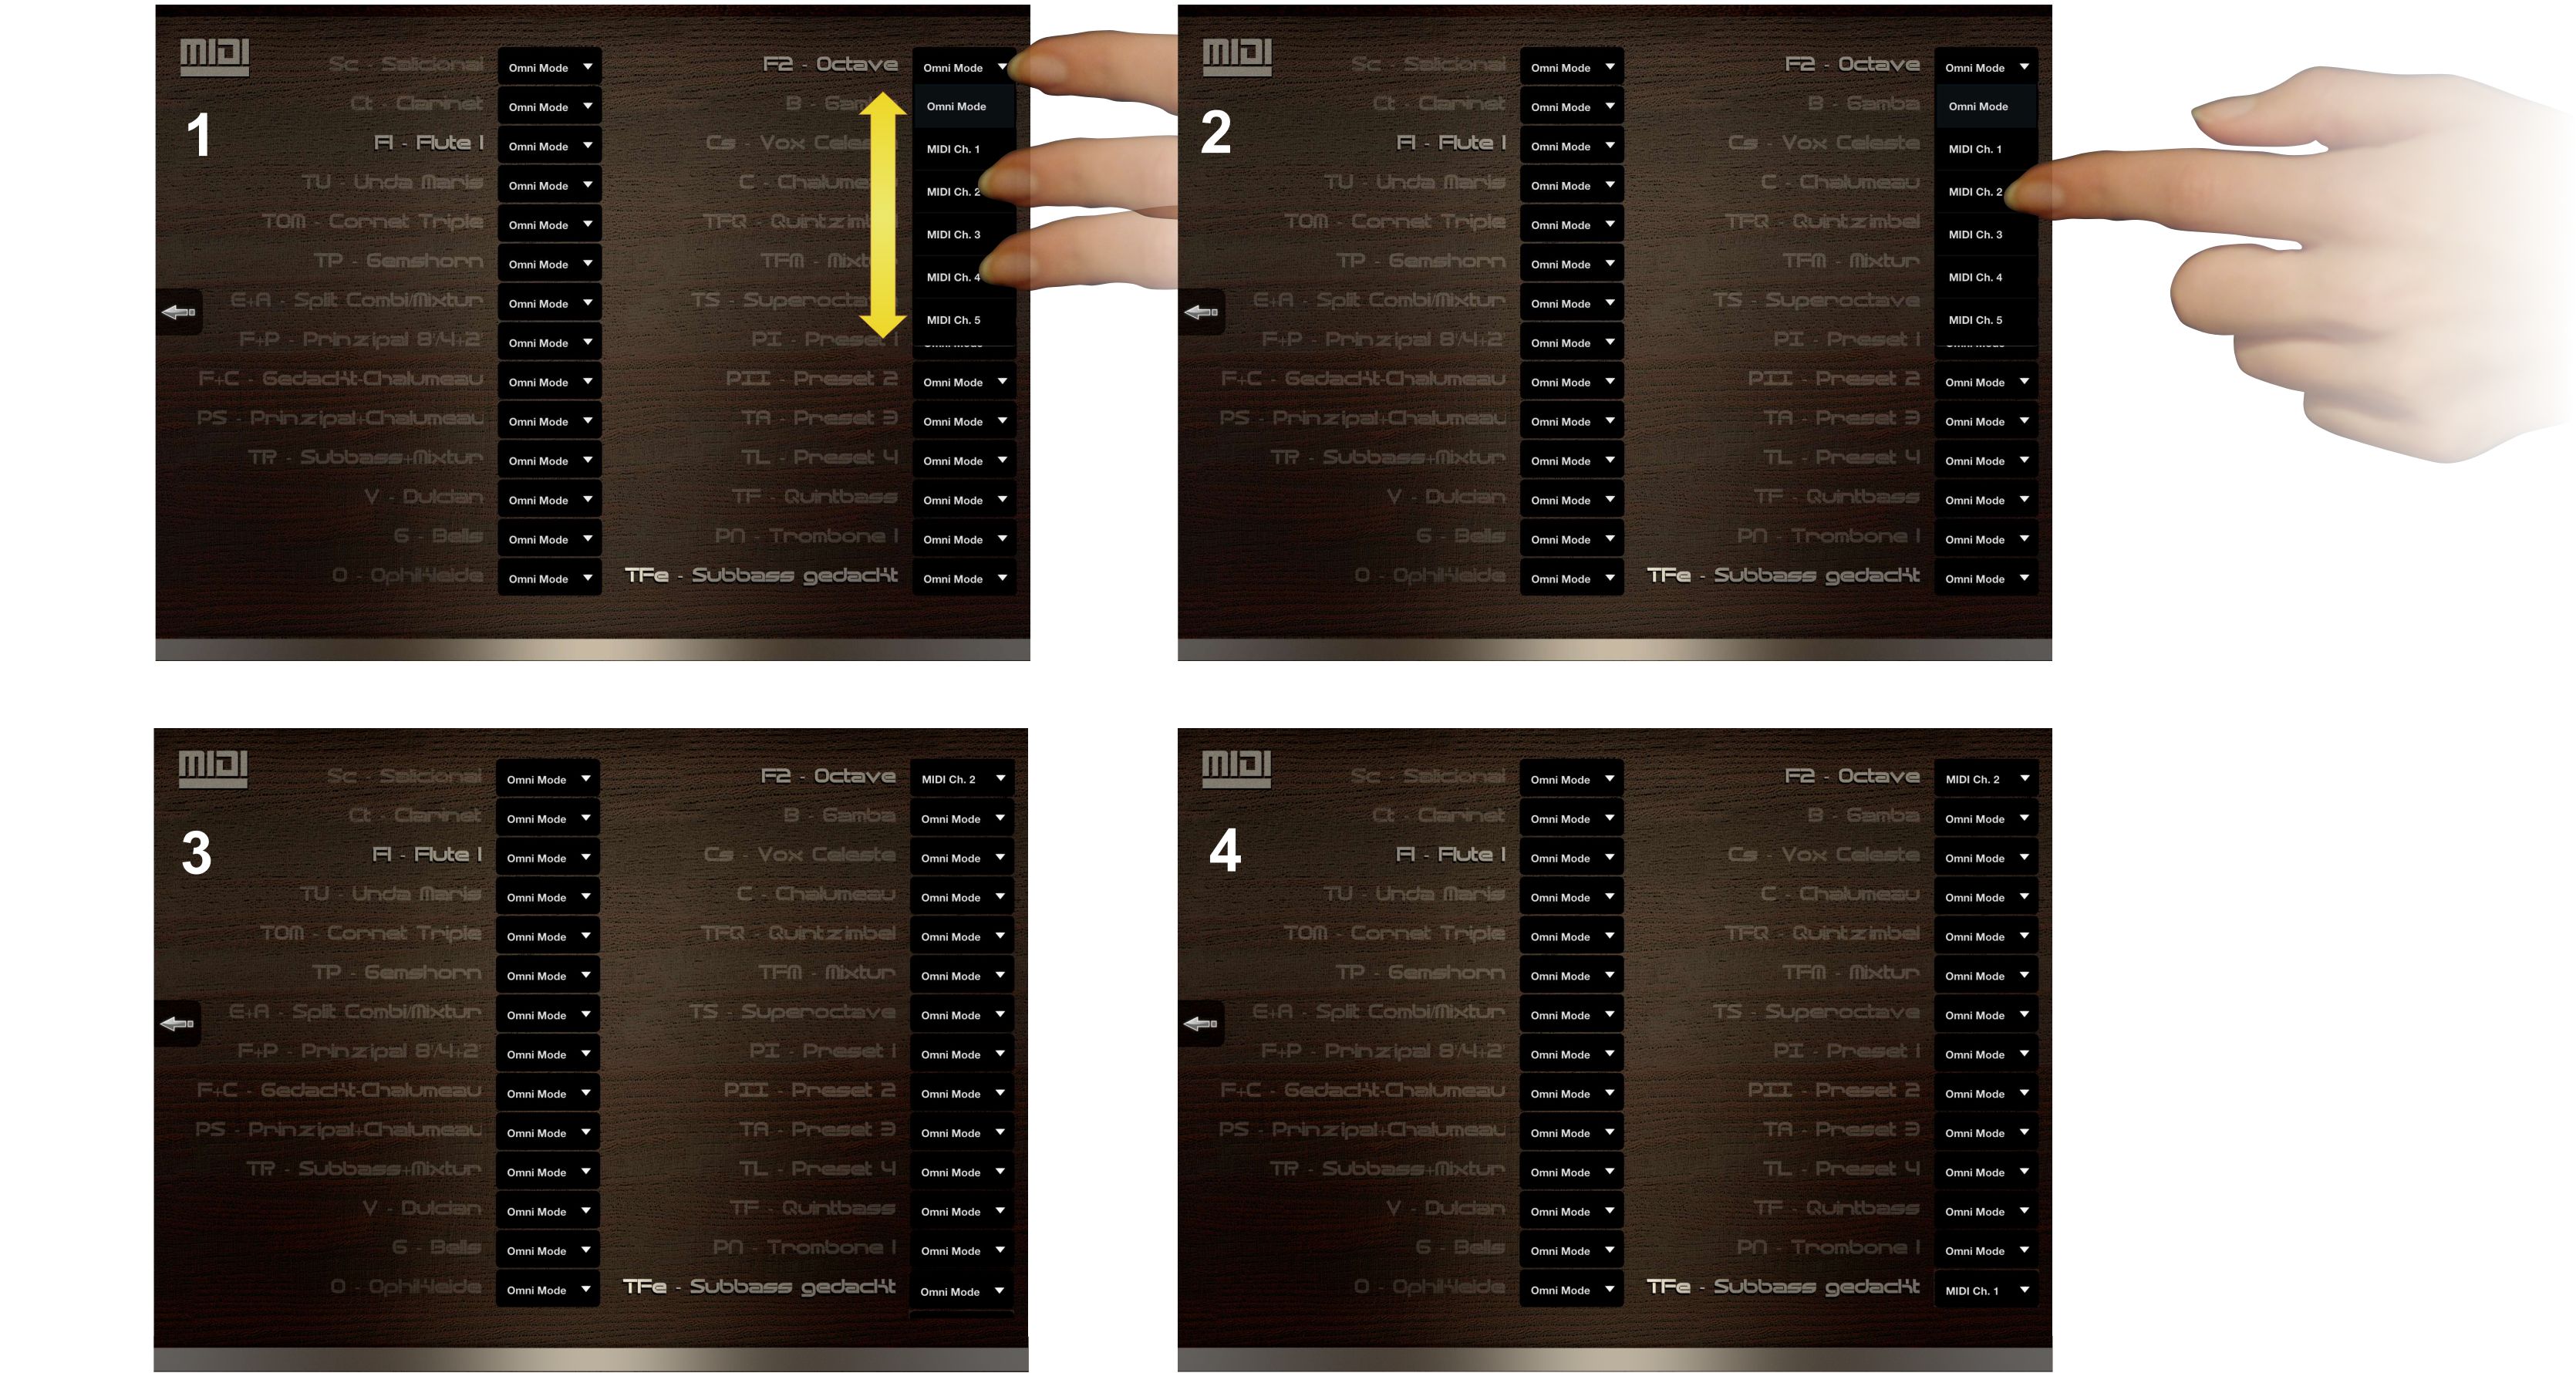
- Tap on the entry "Omni" on the right of "Octave". A list of all 16 MIDI channels, added by the Omni assignment will unfold. If necessary scroll this list up and down by dragging ("swipe") your finger vertically on the list.
- Now tap on the entry "MIDI Ch. 2" on this list.
- As a result of this action the entry "MIDI Ch. 2" will be assigned to "Octave"
- Assign "MIDI channel 1" to "Subbass gedackt" in the same way. Against this don't change the "Omni" assignment of "Flute 1", so that the final result will be as shown above.
 The arrow button will lead you back to the main window.
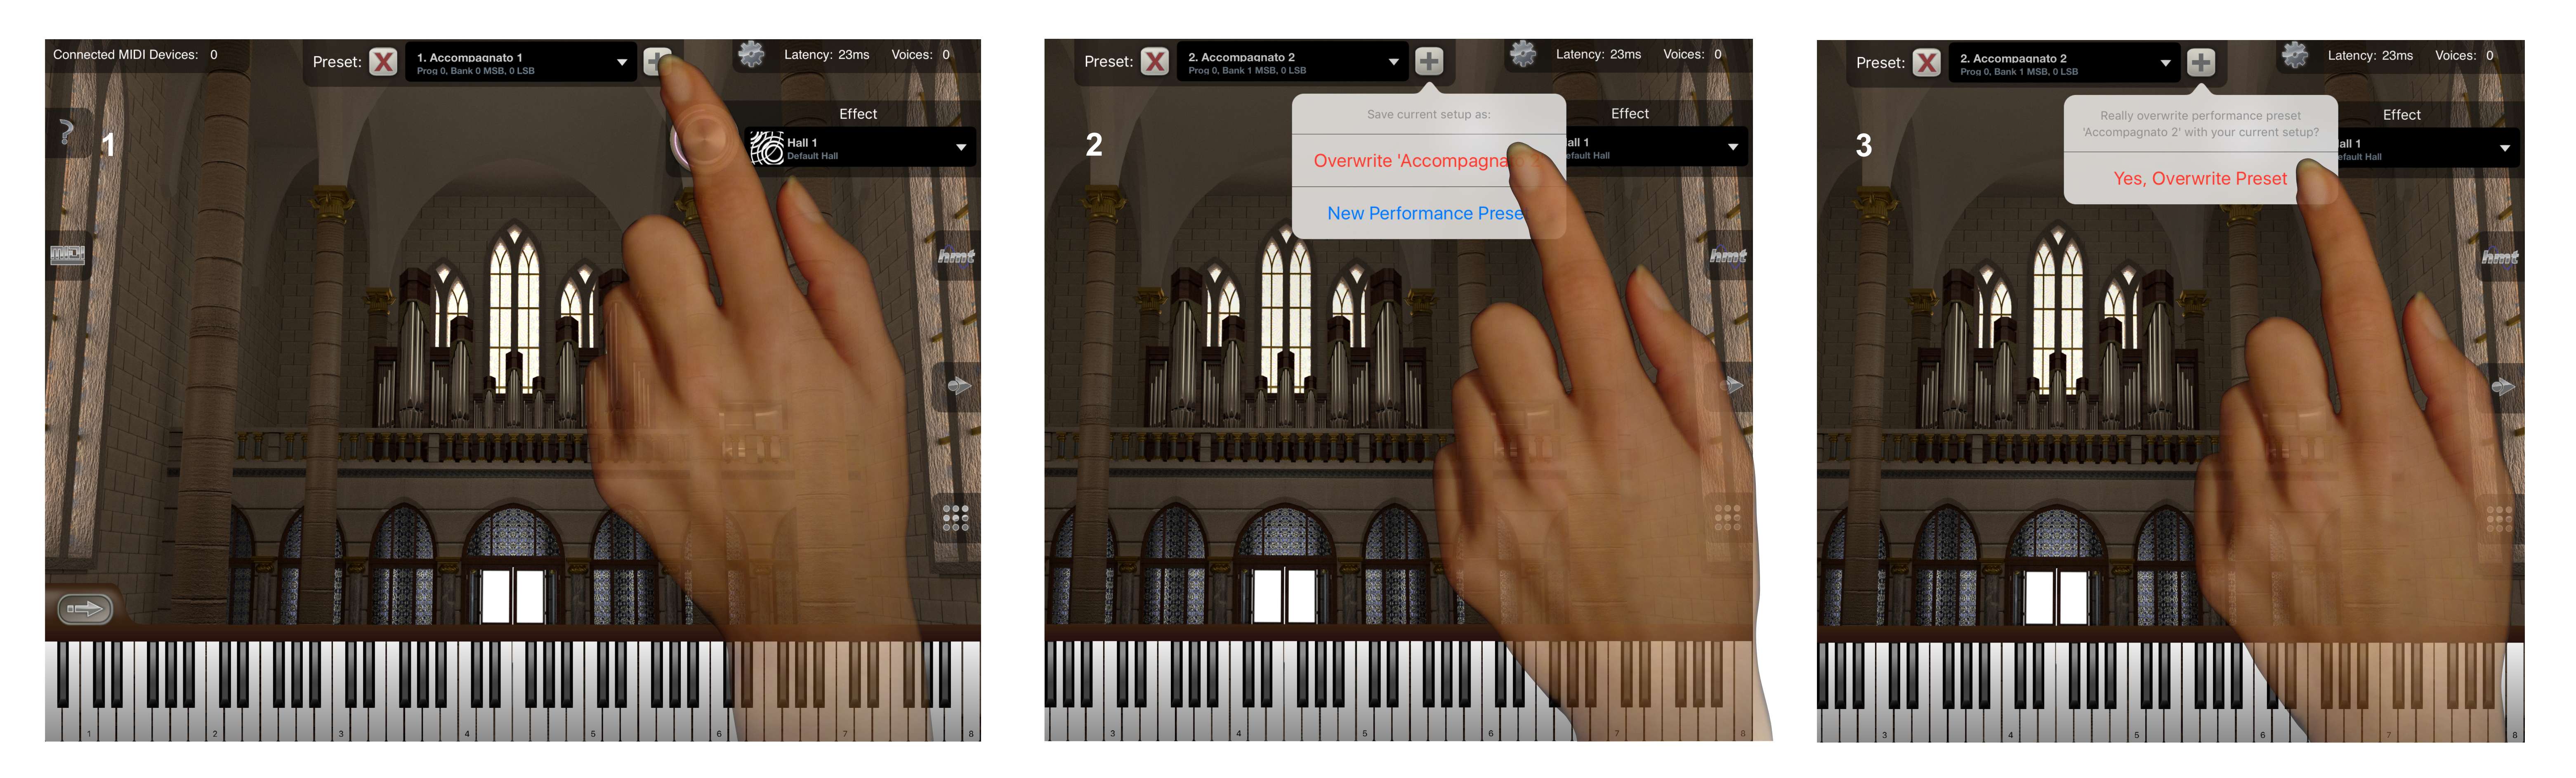
Safe a modified preset
Safe the modified preset as shown below:
Change Volume
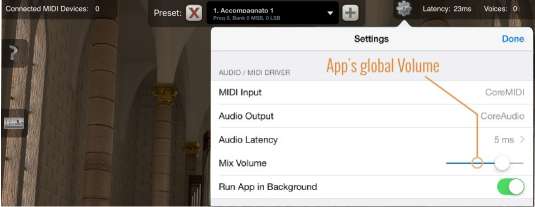
It may happen that on the first start of iCathedral the overall volume will be too quiet or too loud. There exist 3 different tools to correct this:
- The iPad's volume (hardware) control buttons, which you find at the side of your iPad device. You may use these buttons to control the overall volume of the entire device, including other audio apps that may run on your iPad.
- The global mix volume control which you can find on iCathedral's settings screen. See the picture below. Use this to control the app's overall volume, independent of the hardware buttons, mentioned above.
- You may also use standard MIDI CC7 ("MIDI channel volume") messages to control the volume of a part remotely, i.e. either from an external MIDI keyboard, or automated with a MIDI song.